QUICK INFO
| Difficulty | Intermediate |
| Time Required | 25-35 minutes |
| Prerequisites | Basic understanding of JSON syntax, familiarity with AI image generation concepts |
| Tools Needed | Access to Nano Banana Pro (via Gemini app, Google AI Studio, or Vertex AI), text editor for crafting prompts |
What You'll Learn:
- Structure JSON prompts that consistently produce accurate results
- Control resolution, camera angles, lighting, and composition precisely
- Render legible text in images across multiple languages
- Maintain character consistency across multiple generations
- Use reference images and style transfer effectively
GUIDE
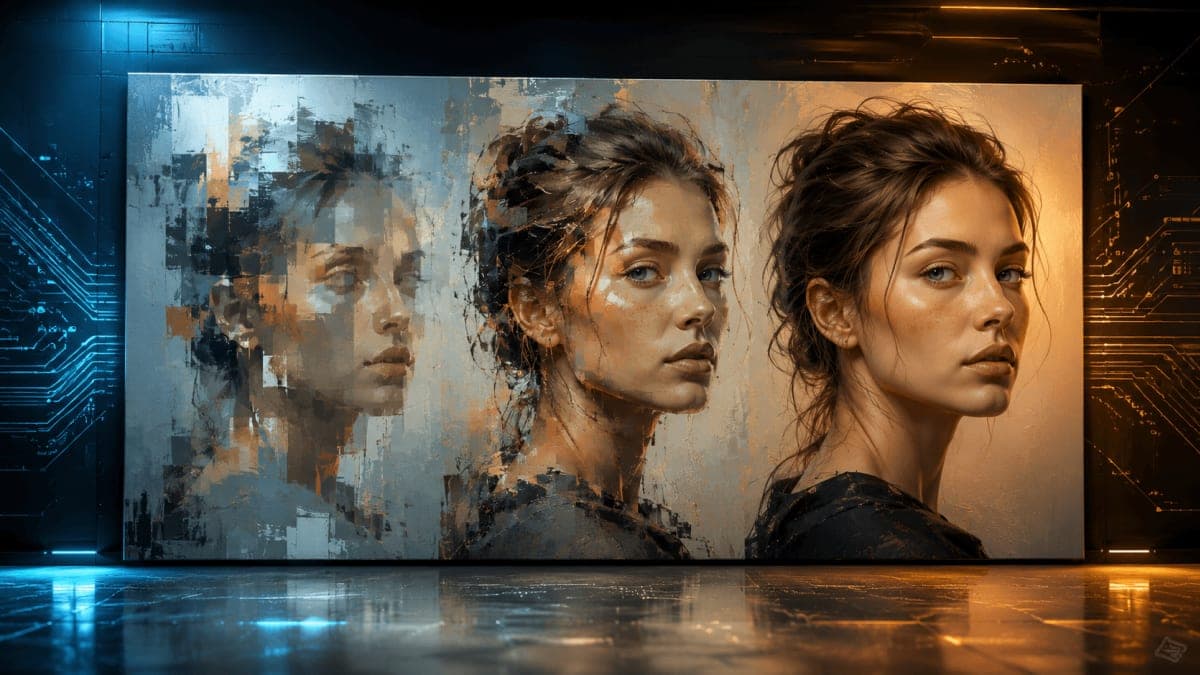
If you've experimented with AI image generation, you know the frustration: you describe what you want, hit generate, and receive something that vaguely resembles your vision. Maybe the text is garbled. Perhaps the lighting is wrong. Or the character you're building a series around looks completely different in each frame.
Nano Banana Pro, Google's Gemini 3 Pro Image model, solves many of these problems through advanced reasoning capabilities. But here's what most users miss: the model responds dramatically better to structured JSON prompts than to freeform text descriptions. When you tell the model exactly what you want using a consistent format, it stops guessing and starts delivering.
This guide is for creators, marketers, and developers who want reliable, repeatable results from AI image generation. You'll learn the JSON prompting framework that transforms Nano Banana Pro from a creative lottery into a precision tool. By the end, you'll have templates you can customize for any project.
Getting Started
Before diving into JSON prompts, ensure you have access to Nano Banana Pro through one of these channels:
- Gemini App: Select "Create images" from the tools menu and choose "Thinking" from the model menu
- Google AI Studio: Use the
gemini-3-pro-imagemodel identifier - Vertex AI: Available for enterprise deployments with full API access
You'll also want a text editor for crafting your prompts. Any editor works, though one with JSON syntax highlighting (like VS Code) helps catch formatting errors before they waste your generation credits.
Note: Nano Banana Pro uses a credit-based system. Higher resolutions consume more credits (4K uses roughly double what 1K uses), so start with lower resolutions while testing your prompts.
Understanding Why JSON Prompts Work Better
When you write a natural language prompt like "a sunset over mountains with dramatic lighting," the model must interpret every word, resolve ambiguities, and make assumptions about everything you didn't specify. Each assumption is a chance for the output to diverge from your vision.
JSON prompts eliminate interpretation overhead. Instead of hoping the model understands what you mean by "dramatic," you specify the exact lighting setup. Rather than leaving resolution to chance, you declare it explicitly. The model spends its reasoning capacity on generation quality rather than prompt interpretation.
Consider the difference:
Natural language: "A professional headshot of a business executive in an office"

JSON structure:
{
  "scene": "corporate headshot portrait",
  "subject": "business executive, confident expression, professional attire",
  "environment": "modern corner office, city skyline visible through windows",
  "camera": {
    "angle": "eye level, slight three-quarter turn",
    "focal_length": "85mm portrait lens",
    "depth_of_field": "shallow, background softly blurred"
  },
  "lighting": {
    "type": "soft studio lighting with large diffused key light",
    "direction": "45 degrees camera left, slightly elevated",
    "fill": "subtle fill from right to open shadows"
  },
  "resolution": "2K",
  "aspect_ratio": "3:4"
}
 The JSON version leaves nothing to chance. Every element has explicit instructions, and the model generates exactly what you specified.
Step-by-Step: Building Your First JSON Prompt
Let's build a complete JSON prompt from scratch, understanding each component as we add it.
Step 1: Define Your Canvas
The most common mistake is not specifying output dimensions. Without explicit resolution and aspect ratio, you'll receive inconsistent sizing across generations.
{
  "resolution": "2K",
  "aspect_ratio": "16:9"
}
Nano Banana Pro supports 1K, 2K, and 4K output. Choose based on your use case:
- 1K: Quick iterations, social media posts, concept testing
- 2K: Most professional work, marketing materials, presentations
- 4K: Print materials, large displays, hero images requiring fine detail
Common aspect ratios include 16:9 (widescreen), 1:1 (square), 9:16 (vertical/mobile), 4:3 (traditional), and 3:2 (photography standard).
What you should see: When you include resolution specs, your outputs maintain consistent dimensions across multiple generations, making them immediately usable without cropping or resizing.
Step 2: Describe Your Scene
The scene description forms the core of your prompt. Be specific about subject, environment, and mood.
{
  "scene_description": {
    "primary_subject": "vintage coffee shop interior",
    "environment": "exposed brick walls, reclaimed wood tables, industrial pendant lights",
    "atmosphere": "warm and inviting, morning light streaming through large windows",
    "time_of_day": "early morning, golden hour"
  },
  "resolution": "2K",
  "aspect_ratio": "3:2"
}
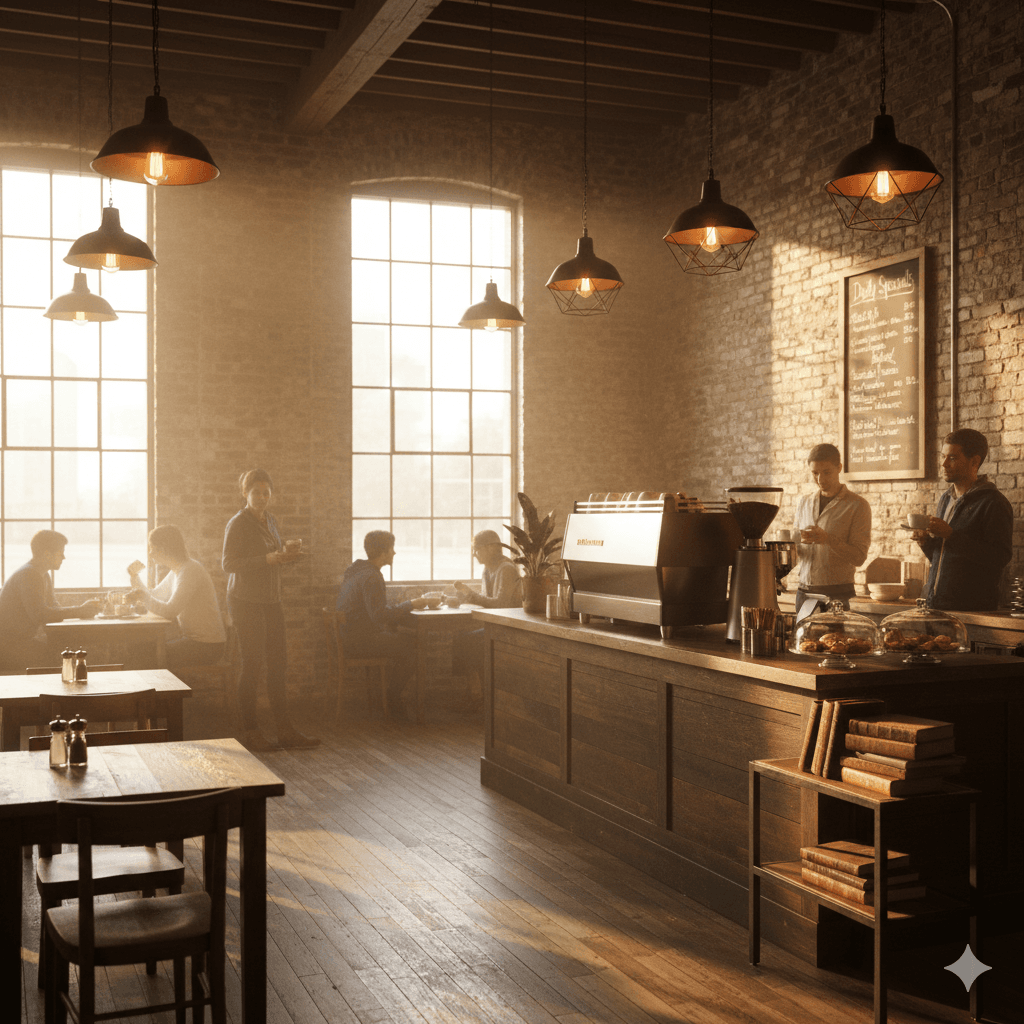 Notice how each element has its own field. This separation helps the model understand relationships between components rather than parsing a single run-on description.
Step 3: Add Camera Controls
Nano Banana Pro includes sophisticated camera simulation. Use it to frame your shots like a professional photographer.
{
"scene_description": {
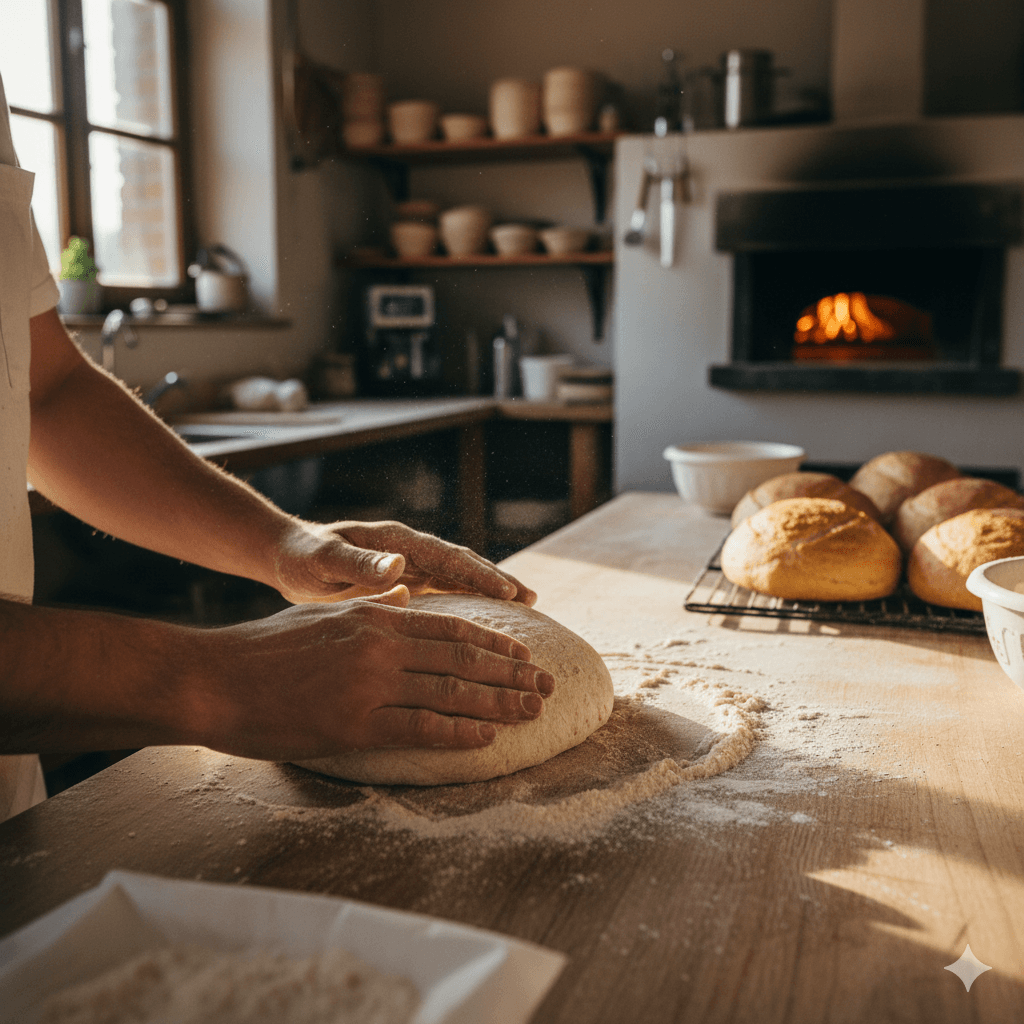
"primary_subject": "artisan baker shaping sourdough",
"environment": "rustic bakery kitchen, flour-dusted wooden surfaces",
"atmosphere": "authentic craftsmanship, focused concentration"
},
"camera": {
"angle": "slightly above, looking down at hands and dough",
"focal_length": "35mm documentary style",
"depth_of_field": "moderate, hands sharp, background recognizable but soft",
"composition": "rule of thirds, subject in left third, workspace filling frame"
},
"resolution": "2K",
"aspect_ratio": "4:3"
}
 Camera parameter options:
- angle: eye level, low angle, high angle, bird's eye, worm's eye, over-shoulder, dutch angle
- focal_length: wide (24mm or less), standard (35-50mm), portrait (85mm), telephoto (100mm+)
- depth_of_field: shallow (subject isolation), moderate (environmental context), deep (everything sharp)
- composition: rule of thirds, centered, golden ratio, symmetrical, leading lines
Step 4: Control Lighting
Lighting transforms good images into great ones. Define your light sources explicitly.
{
  "scene_description": {
    "primary_subject": "ceramic vase with dried botanicals",
    "environment": "minimalist interior, white textured wall",
    "style": "editorial product photography"
  },
  "lighting": {
    "primary_light": {
      "type": "large softbox, diffused",
      "direction": "camera left, 45 degrees",
      "intensity": "bright but soft"
    },
    "secondary_light": {
      "type": "subtle rim light",
      "direction": "behind subject, camera right",
      "purpose": "separation from background"
    },
    "shadows": "soft and gradual, not harsh",
    "color_temperature": "neutral to slightly warm"
  },
  "resolution": "2K",
  "aspect_ratio": "1:1"
}

What you should see: Images with professional lighting setups that would typically require studio equipment. The shadows fall predictably, highlights appear where specified, and the overall mood matches your intention.
Step 5: Add Text Elements
Nano Banana Pro's text rendering is remarkably accurate when you provide explicit instructions. Never assume the model will place text appropriately without guidance.
{
  "scene": "event poster design with gradient background",
  "text_elements": [
    {
      "content": "SUMMER FESTIVAL",
      "position": "upper third, centered horizontally",
      "style": "bold condensed sans-serif, large headline",
      "color": "white with subtle drop shadow",
      "effects": "slight 3D extrusion"
    },
    {
      "content": "August 15-17, 2025",
      "position": "below headline, centered",
      "style": "light weight, medium size",
      "color": "white, 80% opacity"
    },
    {
      "content": "Riverside Park",
      "position": "lower third, centered",
      "style": "elegant script, medium size",
      "color": "gold accent"
    }
  ],
  "background": {
    "type": "gradient",
    "colors": ["deep purple", "coral orange"],
    "direction": "diagonal, top-left to bottom-right"
  },
  "resolution": "2K",
  "aspect_ratio": "9:16"
}
 Critical text rendering tips:
- Always specify exact text content in quotes
- Define position relative to the image (thirds work well)
- Include font style descriptions (the model interprets these visually)
- For non-English text, add a language field to ensure proper character rendering
Step 6: Use Reference Images
Nano Banana Pro accepts up to 14 reference images. The key is telling the model exactly what to extract from each one.
{
  "scene": "product photography for new smartphone",
  "reference_images": [
    {
      "image_id": 1,
      "purpose": "style reference",
      "extract": "lighting setup and shadow quality",
      "apply_to": "entire composition"
    },
    {
      "image_id": 2,
      "purpose": "product reference",
      "extract": "exact device shape and screen content",
      "apply_to": "main subject"
    },
    {
      "image_id": 3,
      "purpose": "environment reference",
      "extract": "surface texture and background gradient",
      "apply_to": "setting and backdrop"
    }
  ],
  "blend_instructions": "combine seamlessly as premium product photography",
  "resolution": "4K",
  "aspect_ratio": "1:1"
}
Without explicit extraction instructions, the model guesses which elements matter from each reference. With them, you get predictable, controlled results.
Step 7: Enable Thinking Mode for Complex Compositions
For intricate scenes with multiple elements, diagrams, or infographics, thinking mode activates deeper reasoning before generation.
{
  "mode": "thinking",
  "composition": "educational diagram showing photosynthesis process",
  "reasoning_requirements": [
    "arrange process stages in logical left-to-right flow",
    "include accurate labels for each stage",
    "show sun, plant, water, and carbon dioxide inputs clearly",
    "illustrate oxygen and glucose outputs distinctly",
    "maintain scientific accuracy in all representations"
  ],
  "visual_approach": {
    "style": "clean educational illustration",
    "color_scheme": "nature-inspired greens and blues with yellow sun accents",
    "label_style": "clear sans-serif, high contrast against backgrounds"
  },
  "resolution": "2K",
  "aspect_ratio": "16:9"
}
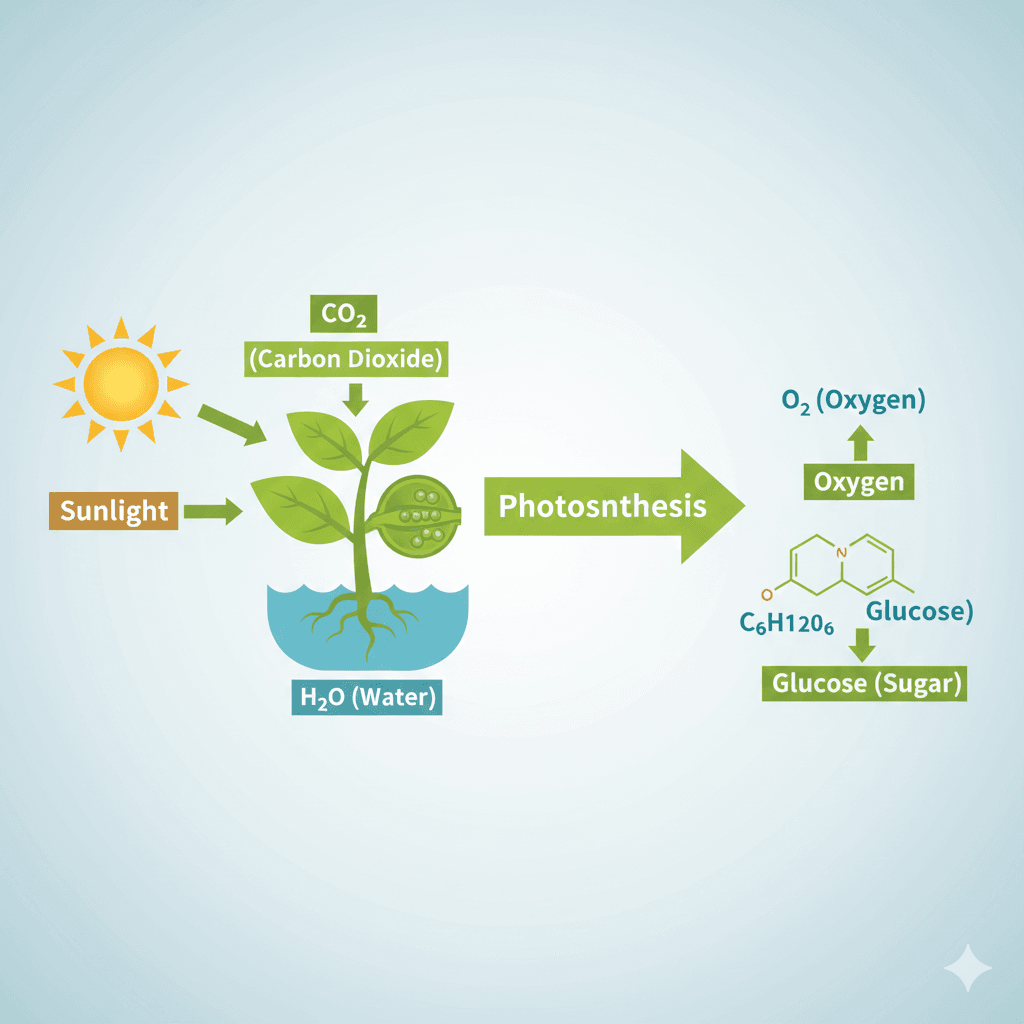 Thinking mode adds processing time but dramatically improves accuracy for anything requiring logical relationships, accurate data representation, or complex spatial arrangements.
Step 8: Maintain Character Consistency
When building image series featuring the same people, lock in character details to maintain identity across generations.
{
  "scene": "podcast recording session",
  "characters": [
    {
      "id": "host",
      "description": "woman in her 30s, shoulder-length dark wavy hair, warm brown eyes, friendly expression",
      "attire": "casual blazer over graphic tee, visible headphones",
      "position": "left side of frame, angled toward guest",
      "consistency_priority": "high"
    },
    {
      "id": "guest",
      "description": "man in his 40s, short gray-streaked hair, glasses, thoughtful expression",
      "attire": "casual button-down shirt, sleeves rolled",
      "position": "right side of frame, engaged in conversation",
      "consistency_priority": "high"
    }
  ],
  "environment": "professional podcast studio, acoustic panels, warm lighting",
  "interaction": "animated discussion, both leaning in slightly",
  "resolution": "2K",
  "aspect_ratio": "16:9"
}
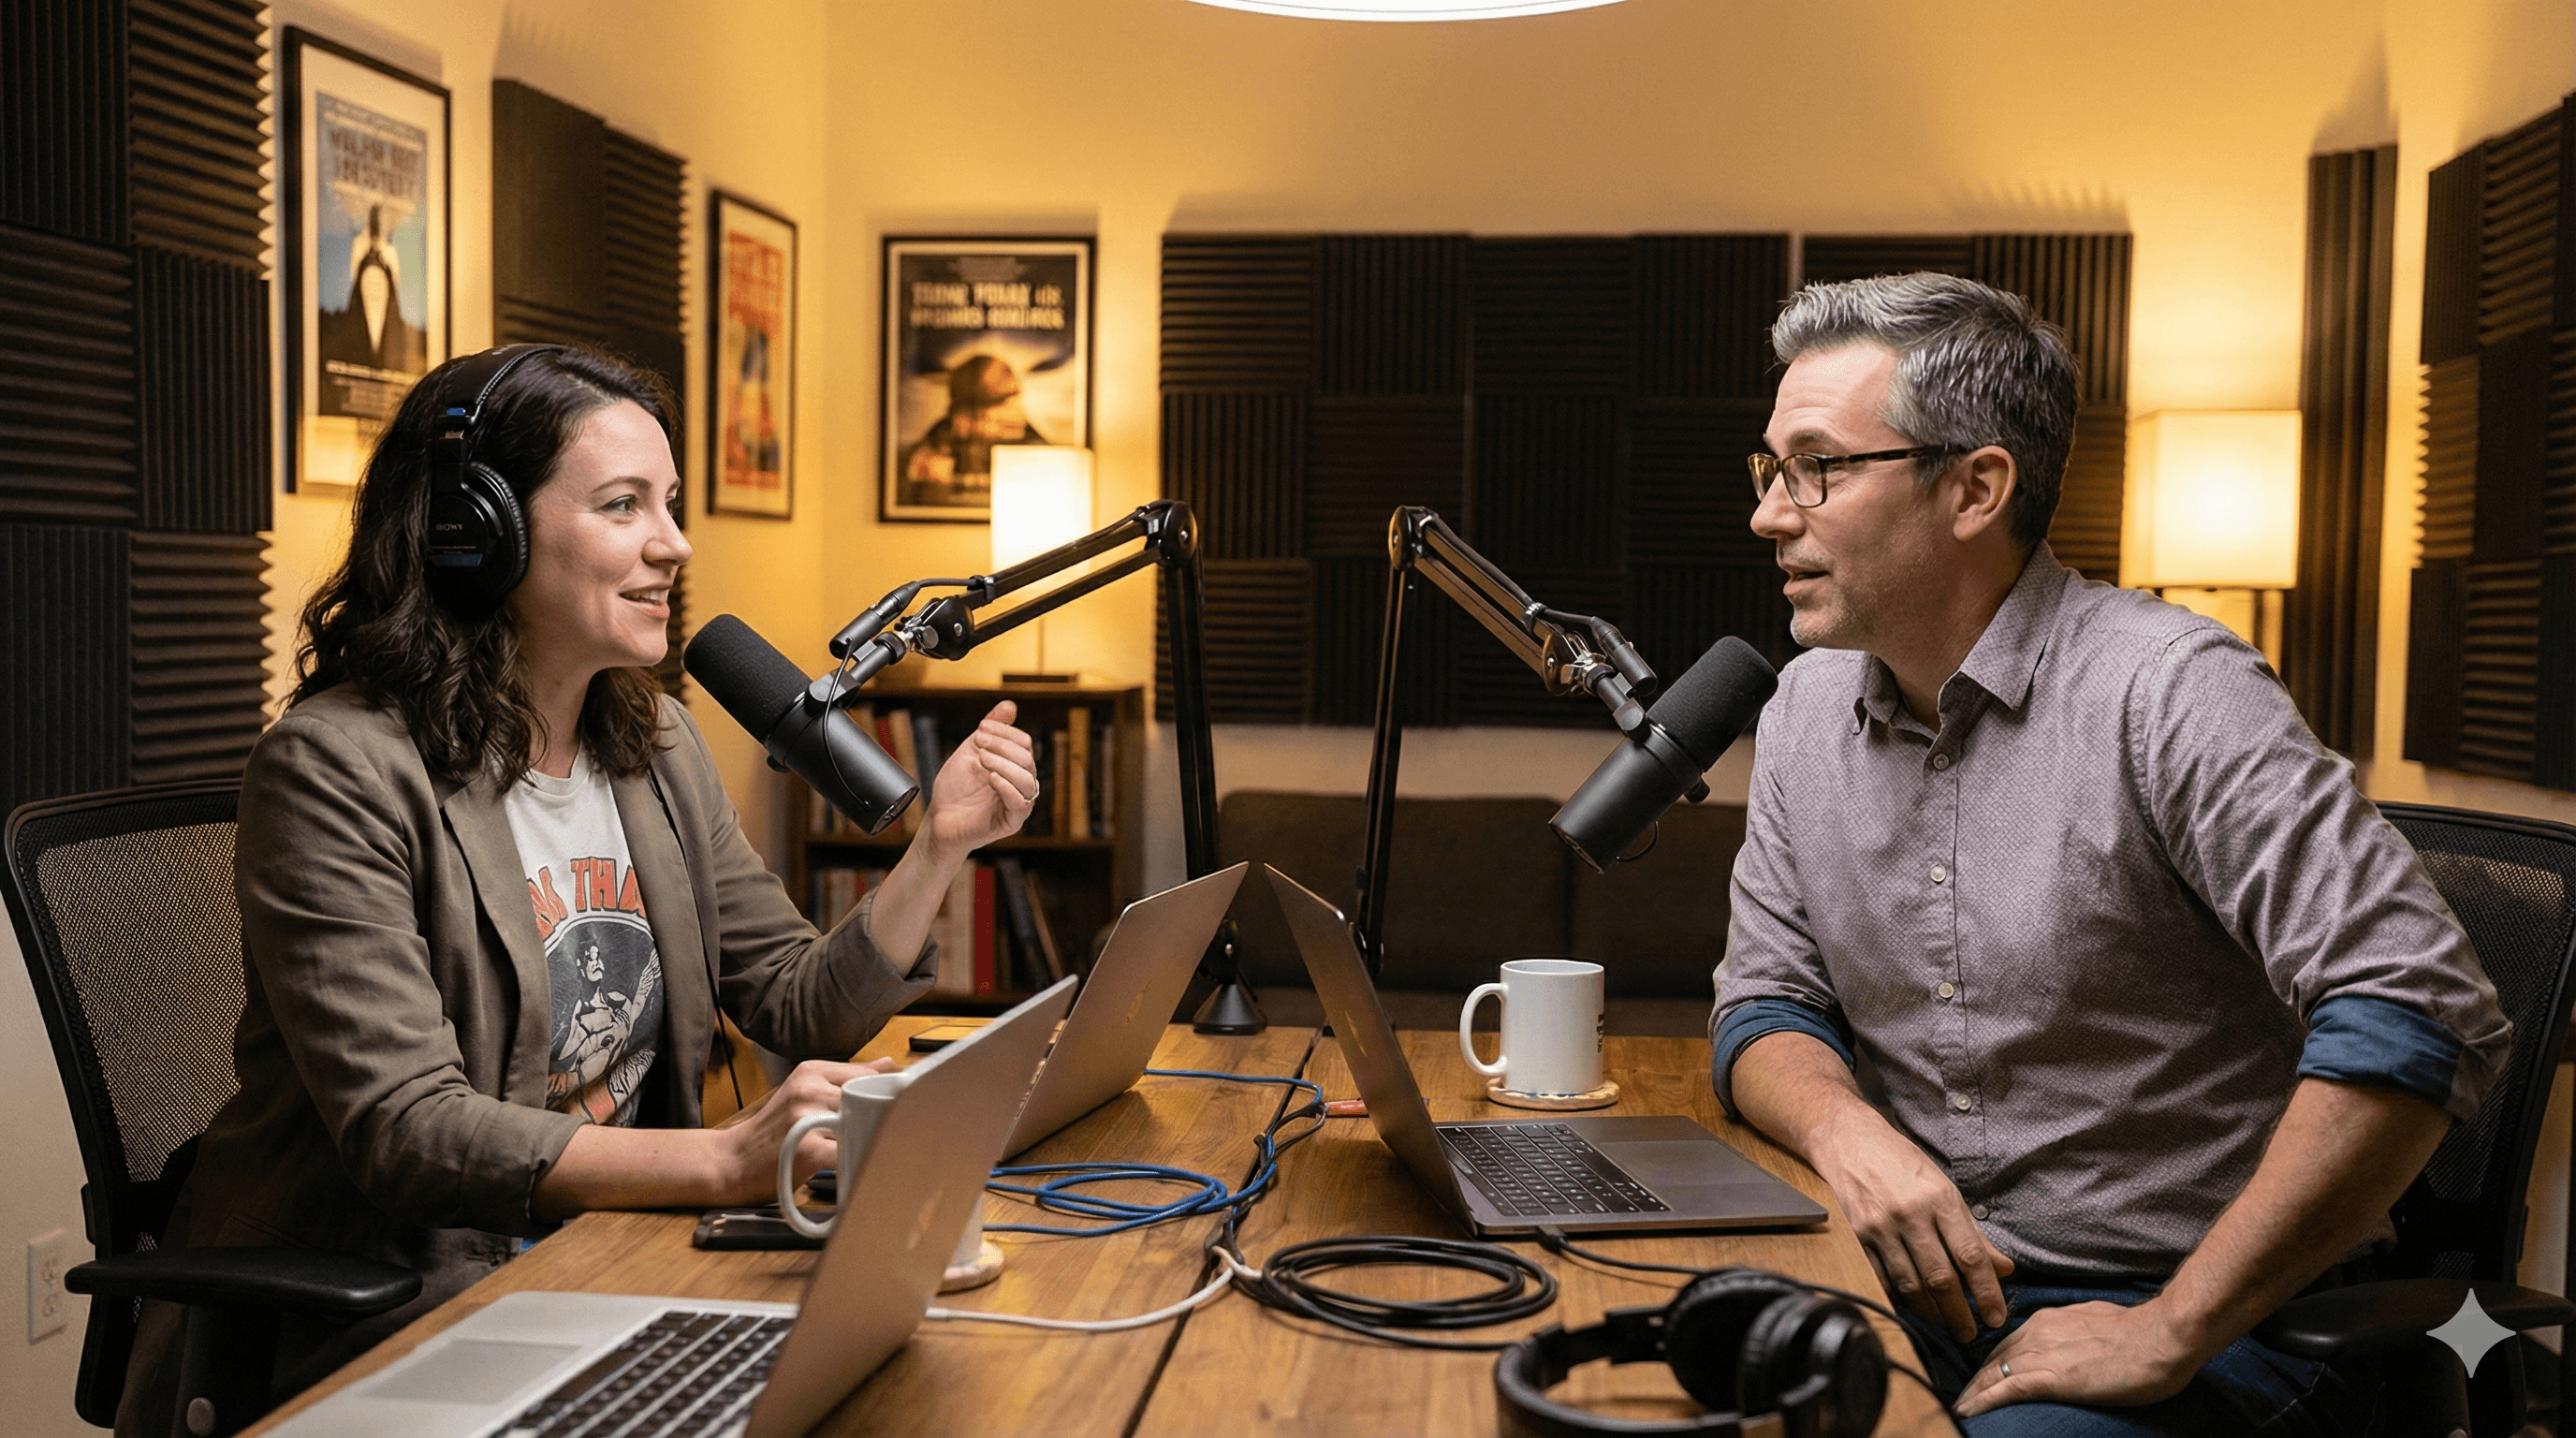 For subsequent images in the series, include the same character descriptions and reference the original generation. The model can maintain consistency for up to 5 distinct characters.
Tips and Best Practices
Start with lower resolution for iterations. Develop your prompt at 1K, refine until the composition matches your vision, then scale to 2K or 4K for the final output.
Use the grounding feature for factual content. When creating infographics, maps, or anything requiring current data, enable Google Search grounding:
{
  "grounding": {
    "enabled": true,
    "search_query": "current renewable energy adoption statistics Europe 2025",
    "data_requirements": ["percentage by country", "year-over-year growth"],
    "accuracy_verification": true
  }
}
Build a prompt library. Save successful prompts as templates. Modify specific fields for new projects rather than starting from scratch each time.
Test edge cases explicitly. If text might wrap, specify line breaks. If colors might clash, define exact hex values. The more explicit your instructions, the more predictable your results.
Combine multiple techniques progressively. Don't try to use every feature in your first prompt. Master canvas definition, then add camera controls, then lighting, building complexity as you gain confidence.
Troubleshooting Common Issues
Problem: Text appears garbled or illegible Solution: Add explicit font style descriptions and ensure position coordinates are clear. Include size relative to the image (small, medium, large, or percentage). For complex text, use thinking mode.
Problem: Character appearance changes between generations Solution: Increase description specificity. Add unique identifying features (specific hair texture, distinctive accessories, facial structure details). Include the consistency_priority field set to high.
Problem: Lighting doesn't match specifications Solution: Describe lighting relative to the camera position, not the scene. Specify direction as "camera left/right" rather than cardinal directions. Add shadow behavior descriptions.
Problem: Reference images aren't influencing output Solution: Be more explicit about what to extract from each reference. Don't just upload images and expect the model to understand their purpose. The extract and apply_to fields are essential.
Problem: Complex diagrams have logical errors Solution: Always use thinking mode for diagrams, infographics, or flowcharts. Include explicit reasoning_requirements that spell out the logic you need. Consider breaking complex diagrams into smaller components generated separately.
Problem: Colors differ from what you expected Solution: Use specific color descriptions or hex codes rather than general terms. "Deep teal #006666" produces more consistent results than "blue-green."
Wrapping Up
JSON prompting transforms Nano Banana Pro from a creative guessing game into a precision tool. By structuring your requests with explicit canvas definitions, camera controls, lighting setups, and text specifications, you eliminate the interpretation gaps that lead to unexpected results.
Start with the basic canvas and scene structure from Step 1 and Step 2. Once you're getting consistent results there, add camera and lighting controls. Graduate to text rendering and reference images as your comfort grows. The master template at the end of this guide combines all techniques for complex projects.
Your next step: take a project you're currently working on and convert your natural language prompt to JSON structure. Compare the results. The difference in accuracy and control will convince you that the extra structure is worth the effort.
PROMPT TEMPLATES
Template 1: Product Photography
{
  "scene_description": {
    "primary_subject": "[YOUR PRODUCT]",
    "environment": "[SURFACE/BACKDROP DESCRIPTION]",
    "style": "premium product photography"
  },
  "camera": {
    "angle": "[eye level/elevated/low angle]",
    "focal_length": "100mm macro for detail shots, 50mm for context shots",
    "depth_of_field": "shallow, product sharp, background creamy bokeh"
  },
  "lighting": {
    "primary": "large softbox camera left",
    "fill": "reflector camera right",
    "rim": "subtle backlight for edge definition"
  },
  "color_grade": "[warm/cool/neutral]",
  "resolution": "4K",
  "aspect_ratio": "1:1"
}
How to customize: Replace bracketed fields with your specific product, surface choice, and preferred mood. Adjust lighting warmth to match brand guidelines.
Template 2: Social Media Graphics with Text
{
  "scene": "[VISUAL CONCEPT/BACKGROUND]",
  "text_elements": [
    {
      "content": "[HEADLINE TEXT]",
      "position": "upper third, centered",
      "style": "bold, impactful, [font family description]",
      "color": "[high contrast against background]"
    },
    {
      "content": "[SUBHEAD OR CTA]",
      "position": "lower third, centered",
      "style": "lighter weight, smaller",
      "color": "[complementary color]"
    }
  ],
  "brand_elements": {
    "logo_position": "bottom right corner",
    "color_palette": ["[primary]", "[secondary]", "[accent]"]
  },
  "resolution": "2K",
  "aspect_ratio": "[1:1 for feed, 9:16 for stories]"
}
How to customize: Define your visual background concept, insert your copy, and specify your brand colors. The model will integrate everything cohesively.
Template 3: Character Series
{
  "series_id": "[UNIQUE PROJECT IDENTIFIER]",
  "scene": "[CURRENT SCENE DESCRIPTION]",
  "characters": [
    {
      "id": "[CHARACTER NAME]",
      "description": "[DETAILED PHYSICAL DESCRIPTION - hair, eyes, build, distinguishing features]",
      "expression": "[CURRENT EMOTION/MOOD]",
      "attire": "[SPECIFIC CLOTHING FOR THIS SCENE]",
      "pose": "[BODY POSITION AND GESTURE]",
      "position_in_frame": "[WHERE IN COMPOSITION]",
      "consistency_priority": "high"
    }
  ],
  "environment": "[SETTING DETAILS]",
  "lighting": {
    "mood": "[atmospheric description]",
    "time_of_day": "[if applicable]"
  },
  "camera": {
    "shot_type": "[close-up/medium/wide]",
    "angle": "[perspective]"
  },
  "resolution": "2K",
  "aspect_ratio": "16:9"
}
How to customize: The character description should remain identical across all images in a series. Only change expression, attire, pose, and scene-specific elements.
Template 4: Master Multi-Feature Prompt
{
  "generation_mode": "[thinking/standard]",

  "output_specs": {
    "resolution": "[1K/2K/4K]",
    "aspect_ratio": "[W:H]",
    "quality_priority": "[speed/balanced/quality]"
  },

  "scene": {
    "subject": "[PRIMARY FOCUS]",
    "environment": "[SETTING]",
    "atmosphere": "[MOOD]",
    "style": "[VISUAL AESTHETIC]",
    "time_of_day": "[IF RELEVANT]"
  },

  "camera": {
    "angle": "[PERSPECTIVE]",
    "focal_length": "[LENS TYPE]",
    "depth_of_field": "[FOCUS STYLE]",
    "composition": "[FRAMING APPROACH]"
  },

  "lighting": {
    "key_light": {
      "type": "[SOURCE TYPE]",
      "direction": "[POSITION]",
      "intensity": "[LEVEL]"
    },
    "fill": "[SHADOW MANAGEMENT]",
    "color_temperature": "[WARM/COOL/NEUTRAL]",
    "special": "[RIM/PRACTICAL/EFFECTS]"
  },

  "color_grade": {
    "tone": "[OVERALL FEEL]",
    "palette": ["[COLOR1]", "[COLOR2]", "[COLOR3]"],
    "mood_impact": "[EMOTIONAL GOAL]"
  },

  "text_elements": [
    {
      "content": "[EXACT TEXT]",
      "position": "[LOCATION]",
      "style": "[TYPOGRAPHY]",
      "color": "[TEXT COLOR]",
      "effects": "[OPTIONAL TREATMENTS]"
    }
  ],

  "reference_images": [
    {
      "image_id": 1,
      "purpose": "[WHAT IT'S FOR]",
      "extract": "[WHAT TO USE]",
      "apply_to": "[WHERE TO USE IT]"
    }
  ],

  "characters": [
    {
      "id": "[NAME]",
      "description": "[FULL DETAILS]",
      "position": "[PLACEMENT]",
      "consistency": "high"
    }
  ],

  "grounding": {
    "enabled": "[true/false]",
    "search": "[QUERY IF NEEDED]",
    "data_needs": ["[SPECIFIC INFO]"]
  },

  "constraints": {
    "must_include": ["[REQUIRED ELEMENTS]"],
    "must_avoid": ["[EXCLUDED ELEMENTS]"]
  }
}
How to customize: This is your comprehensive template. Remove sections you don't need for simpler projects. Fill in all sections for maximum control on complex compositions.
FAQ
Q: Do I need to use JSON for every Nano Banana Pro generation? A: No. For simple, one-off images where you don't need precise control, natural language works fine. JSON prompts shine when you need consistency, accuracy, or complex compositions. Use the right tool for the job.
Q: How do I know if my JSON syntax is correct? A: Use a JSON validator (many free online tools exist) before submitting your prompt. A single missing comma or bracket will cause parsing errors. Most code editors also highlight syntax issues automatically.
Q: What happens if I include contradictory instructions? A: The model attempts to reconcile conflicts, but results become unpredictable. If you specify "bright daylight" in scene description but "dark moody shadows" in lighting, expect confusion. Review your prompt for consistency before generating.
Q: Can I mix JSON structure with natural language? A: Yes. You can use JSON for technical specifications while keeping descriptions more conversational within the value fields. The model handles both structured parameters and expressive descriptions.
Q: How much does resolution affect generation time and cost? A: 4K takes roughly twice as long as 1K and uses more credits (typically 2x). Start development at 1K, finalize at your target resolution. The quality difference is substantial for detail-heavy images but less noticeable for simpler compositions.
Q: Why doesn't my text render in the correct language? A: Add an explicit language field to your text elements. The model supports many languages but benefits from knowing which character set and text direction to use. For right-to-left languages, specify "direction": "rtl" as well.
RESOURCES
- Google AI Studio - Direct access to Nano Banana Pro for experimentation
- Gemini API Documentation - Official developer documentation for API integration
- Google DeepMind Nano Banana Pro Overview - Capabilities and examples from the source
- Vertex AI Image Generation - Enterprise deployment documentation
- JSON Formatter & Validator - Free tool to validate your prompt syntax before use